How to Import RSS feed into Facebook Fan Page

If you have a new Facebook Fan Page, you are probably wondering where the heck the import blog feature went.. Facebook now has it hidden in a tricky little spot.. (for those with existing Fan Pages, yours is still in the same spot, but new pages, without any ‘notes’, can’t see this feature straight up).

Step 1.) Login to Facebook

Head over to http://www.facebook.com/ and login.

Step 2.) Ads and Pages

Once logged in, click on Ads and Pages. If you have any ads going, it will start on the “ads” page, and you’ll need to click on pages again from the menu, otherwise, it should now give you a list of pages where you are an admin.

Step 3.) Edit Page

Click on “Edit Page” under the Fan page where you wish to import your RSS feed.

Step 4.) Notes

Now scroll down to the Notes application and click on Edit

Step 5.) Write a Note

If you have not written any notes yet on your Fan page, then you will not see the option to Import a blog. I’m going to assume that you haven’t written any notes, as otherwise, you probably wouldn’t be seeking this information in the first place. Click on the “Write a New Note” button.

Step 6.) Notes icon

Click on the little Notes icon as per image above.

Step 7.) Import a blog

You will now see the Import a blog option. Click on the Import a Blog option.

Step 8.) Type in Feed URL and Start Importing

Now type in your blog Feed URL (ie: http://www.yourdomain.com/feed) , agree to the terms, and click on Start Importing. If you have a self-hosted Wordpress blog, you can also import a specific category of your blog, as I have done in the image above. Click on Start Importing.

Step 9.) Confirm Import

You should see a preview listing of all your blog posts – and if all looks well, click on Confirm Import.

Step 10.) Finished

You’ve now finished setting it up.

Final Result: Notes tab

Visit your Fan Page and click on the Notes tab. This tab will now automatically contain all the posts that it imported and any future notes you write to your blog (or category if you chose category feed).

Final Result: Wall tab

The home page (Wall tab) of your Fan Page will also get a copy of the new notes. 

What to Do When Your Email Account is Hacked?


It can be a real nightmare if someone hacks and takes control of your email account as it may contain confidential information like bank logins, credit card details and other sensitive data. If you are one such Internet user whose email account has been compromised, then this post will surely help you out. In this post you will find the possible ways and procedures to get back your hacked email account.

For Gmail:

It can be a big disaster if your Gmail account has been compromised as it may be associated with several services like Blogger, Analytics, Adwords, Adsense, Orkut etc. Losing access to your Gmail account means losing access to all the services associated it with too. Here is a list of possible recovery actions that you can try.
Step -1: Try resetting your password since it is the easiest way to get your account back in action. In this process Google may ask you to answer the secret question or may send the password reset details to the secondary email address associated with your compromised account. You can reset you password from the following link
If you cannot find success from the Step-1 then proceed to Step-2.
Step-2: Many times the hacker will change the secret question and secondary email address right after the account is compromised. This is the reason for the Password Reset process to fail. If this is the case then you need to contact the Gmail support team by filling out the account recovery form. This form will ask you to fill out several questions like
1. Email addresses of up to five frequently emailed contacts
2. Names of any 4 Labels that you may have created in your account
3. List of other services associated with your compromised account
4. Your last successful login date
5. Account created date
6. Last password that you remember and many more…
You need to fill out this form as much accurately as possible. It is obvious to forget the dates of last login, account creation and similar terms. However you need to figure out the closest possible date/answers and fill out this form. This is your last chance! The more accurate the information filled out in the recovery form, the more the chances of getting your account back. You may reach the account recovery page form the following link

For Yahoo and Hotmail:

Unfortunately for Yahoo/Hotmail there is no second option like filling out the form or contacting the support team. All you need to do is either answer the secret questions that you have setup or reset the password using the secondary email option.
To initiate the password reset process just click on the Forgot password link in your login page and proceed as per the screen instructions.
I hope this post will help you recover the lost account. 

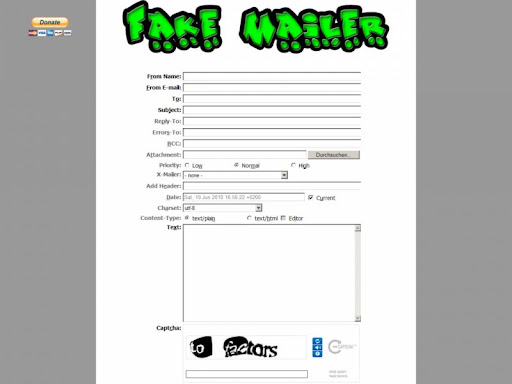
Fake Mailer with attachment


Image and video hosting by TinyPic

Anonymous email, often referred to as prank email, allows the user to send an email without disclosing their identity.

The system uses a simple input form on a web page. Information is entered filling out the elements of a real email. Sender's and recipient's email addresses, subject and message body are usually the minimum required fields. Clicking on the send or submit button activates a script formats the information and then sends out the bogus text with the system mail utility.

The recipient opens a real looking email from the fake address and reads the prank content. 


to send fake mail visit here 


Blog’s Stats and Popular Posts – Two New Official Widgets Added To Blogger Blogs

On July 1st, 2010 blogger launched the Blogger Stats feature to Blogger in Draft. After receiving the feedback from the users they’ve made some improvements to the stats feature and today they officially released two new widgets – Blog’s Stats and Popular Posts which you can add to your blog.
The two new widgets are going to be very helpful for blogger users as they do not need to use any other codes and scripts (Which slow down the loading speed of the blogs) to show theirstats and popular posts to their readers.
Both of these widgets automatically take the data generated by the Blogger stats. To use thesewidgets, you can simply go to Design -> Page Elements and then click on “Add a Gadget“.
The Blog Stats’s widget displays the total pageviews of your blog. You can choose the style of the stat’s widget from various available styles.
The Popular Posts widget as the name suggests helps the blog author to quickly display the popular posts of his/her blog. This gadget also supports different styles and configurations.
Both of these widget are still available on Blogger in Draft.

New Gmail Feature Lets You Call Phones from Gmail

Google has done it again by bringing a new revolutionary VoIP option called Call Phones.
Call phone
Google Voice has brought out this new application enabling you to call your online friends through Gmail no matter at whatever distance they are from you. This is, in fact, the easiest way of receiving calls and dialing calls.
At present, this new Call Phones feature is absolutely free of cost in the US and Canada. However, this feature will soon be priced at 2 cents per minute in other countries. In the US, this facility is expected to remain free for the rest of the year and after that it might be priced at an affordable price.
Remember that the numbers that will be showed in your Gmail account will be used for dialing and receiving calls from this new facility offered by Google Voice. This new feature from the house of Google Voice has been rolled out in August 2010 and is expected to be at free of cost until January 2011 in Canada and the US.
In case, you are not aware of how to call phones using Gmail, then you can learn the procedure here.  First of all, you need to open a Gmail account.  Once, you have opened a Gmail account, then you need to go to the “Chat” option on the left hand side of your Gmail screen.  Make sure to look for the tab that states “Call Phone” and a green phone symbol located just next to this line.
After this, you will be required to install and activate the voice and video plug-in, in case you have not installed it yet. Next step to make phone calls from Gmail is to click on the “Call Phone” tab. In fact, a box will appear that will tell you about this new service of Google. Reading the information in this box, you will get all the information about this new service.
Below this “Call Phone” tab, you will see two options and you need to click on “Accept” option indicating that you agree on understanding the terms of use of this new service. Then, look for the call box on the page. Once, you reach this stage, press on the blue “Call” button at the base of the dial box and then your call will start dialing.
Use this Call Phones facility to talk to friends and family members instantly in countries like Mexico, China, Italy, Germany, France and UK. However, this facility will be available in other countries very soon.

10 Jaw Dropping HTML5 and Javascript Effects

hey guys i am checking for beautiful jquery effects and i found somethigh more interesting that i want  to share it  with you.

Introduction

Alright, HTML5 has been released for quite a while now, and its capabilities never cease to amaze me. Here, I have got 10 more HTML and Javascript demonstrations that show you what they can do. Back to few years ago, implementation of these kind of animations are simply impossible and only can be done with Flash, but now, look at them, impressive animations and effects!

  • Breathing Galaxies
    Breathing Galaxies
    Hypotrochoid with dynamically changing color and diameter. Use the keyboard to change shapes mid-stream, or move the mouse to create a new shape.
  • Noise Field
    Noise Field
    Particle trails via Perlin noise. Move mouse to change particle motion. Click to randomize parameters.
  • Keylight
    Keylight
    A playhead travels between keys which resonate in different sounds depending on where they are placed.
  • Swirling Tentacles
    Swirling Tentacles
    Pulsing 3d wires with color cycling and camera tweening, in 1k of JavaScript.
  • FlowerPower
    FlowerPower
    Another experiment inspired by nature - simple drawing tool with flowers as brushes using bezier curves.
  • Blob
    Blob
    A soft blob that can be thrown around the screen so that it bounces against the browser window. The blob can also be split (double click) into many blobs, the smaller blobs will merge into a single bigger blob if they collide.
  • Rotating Spiral
    Rotating Spiral
    You are getting sleepy, very sleepy.... A resolution independent rotating spiral – simple, but visually compelling. Click to start, stop, and reverse the rotation.
  • Magnetic
    Magnetic
    Magnetic points are used to control a flow of particles. If there are many particles orbiting a magnet, it will radiate color and increase in size.
  • Trail
    Trail
    Colorful particles follow and rotate around the mouse position to generate an organic trail which then fades out slowly.
  • Graph Layout
    Graph Layout
    An interactive force-directed graph layout.
thanks to queness for this information